Adobe Spark Post: Text Image Mask
Ever wonder how those text images are made?Why I chose Darkness Falls, I have no idea. Maybe it was the image that inspired the text. Nevertheless, it conveys the eerie message I wanted to share.Graphic designers have used a method called Masking or Clipping Mask to create text images like these. Using software like Adobe Photoshop, Illustrator or InDesign, designers can mask the image. Revealing only a portion of the image visible through the text.Check out this tutorial if you want to learn how to create it using Photoshop.Do I need Photoshop to create masked text images? The answer is no. Anyone can create text like these using Adobe Spark Post. Let me show you how.
Start With The Images
Before jumping into Adobe Spark Post, consider first the photos you’ll be using to create these text image masks. You’ll want to be intentional when it comes to creating masked content.What do I mean by intentional? Basically, think about the message you want to convey or the story you want to tell. Check out these examples. [table id=7 /]Which image works best for the mood of darkness falls? Hopefully, you answered the first one. A little thought behind the image will help. Is it necessary? No, but if you want the reader or viewer to follow along, it may be a good idea to be intentional with your images.
Masking the Text
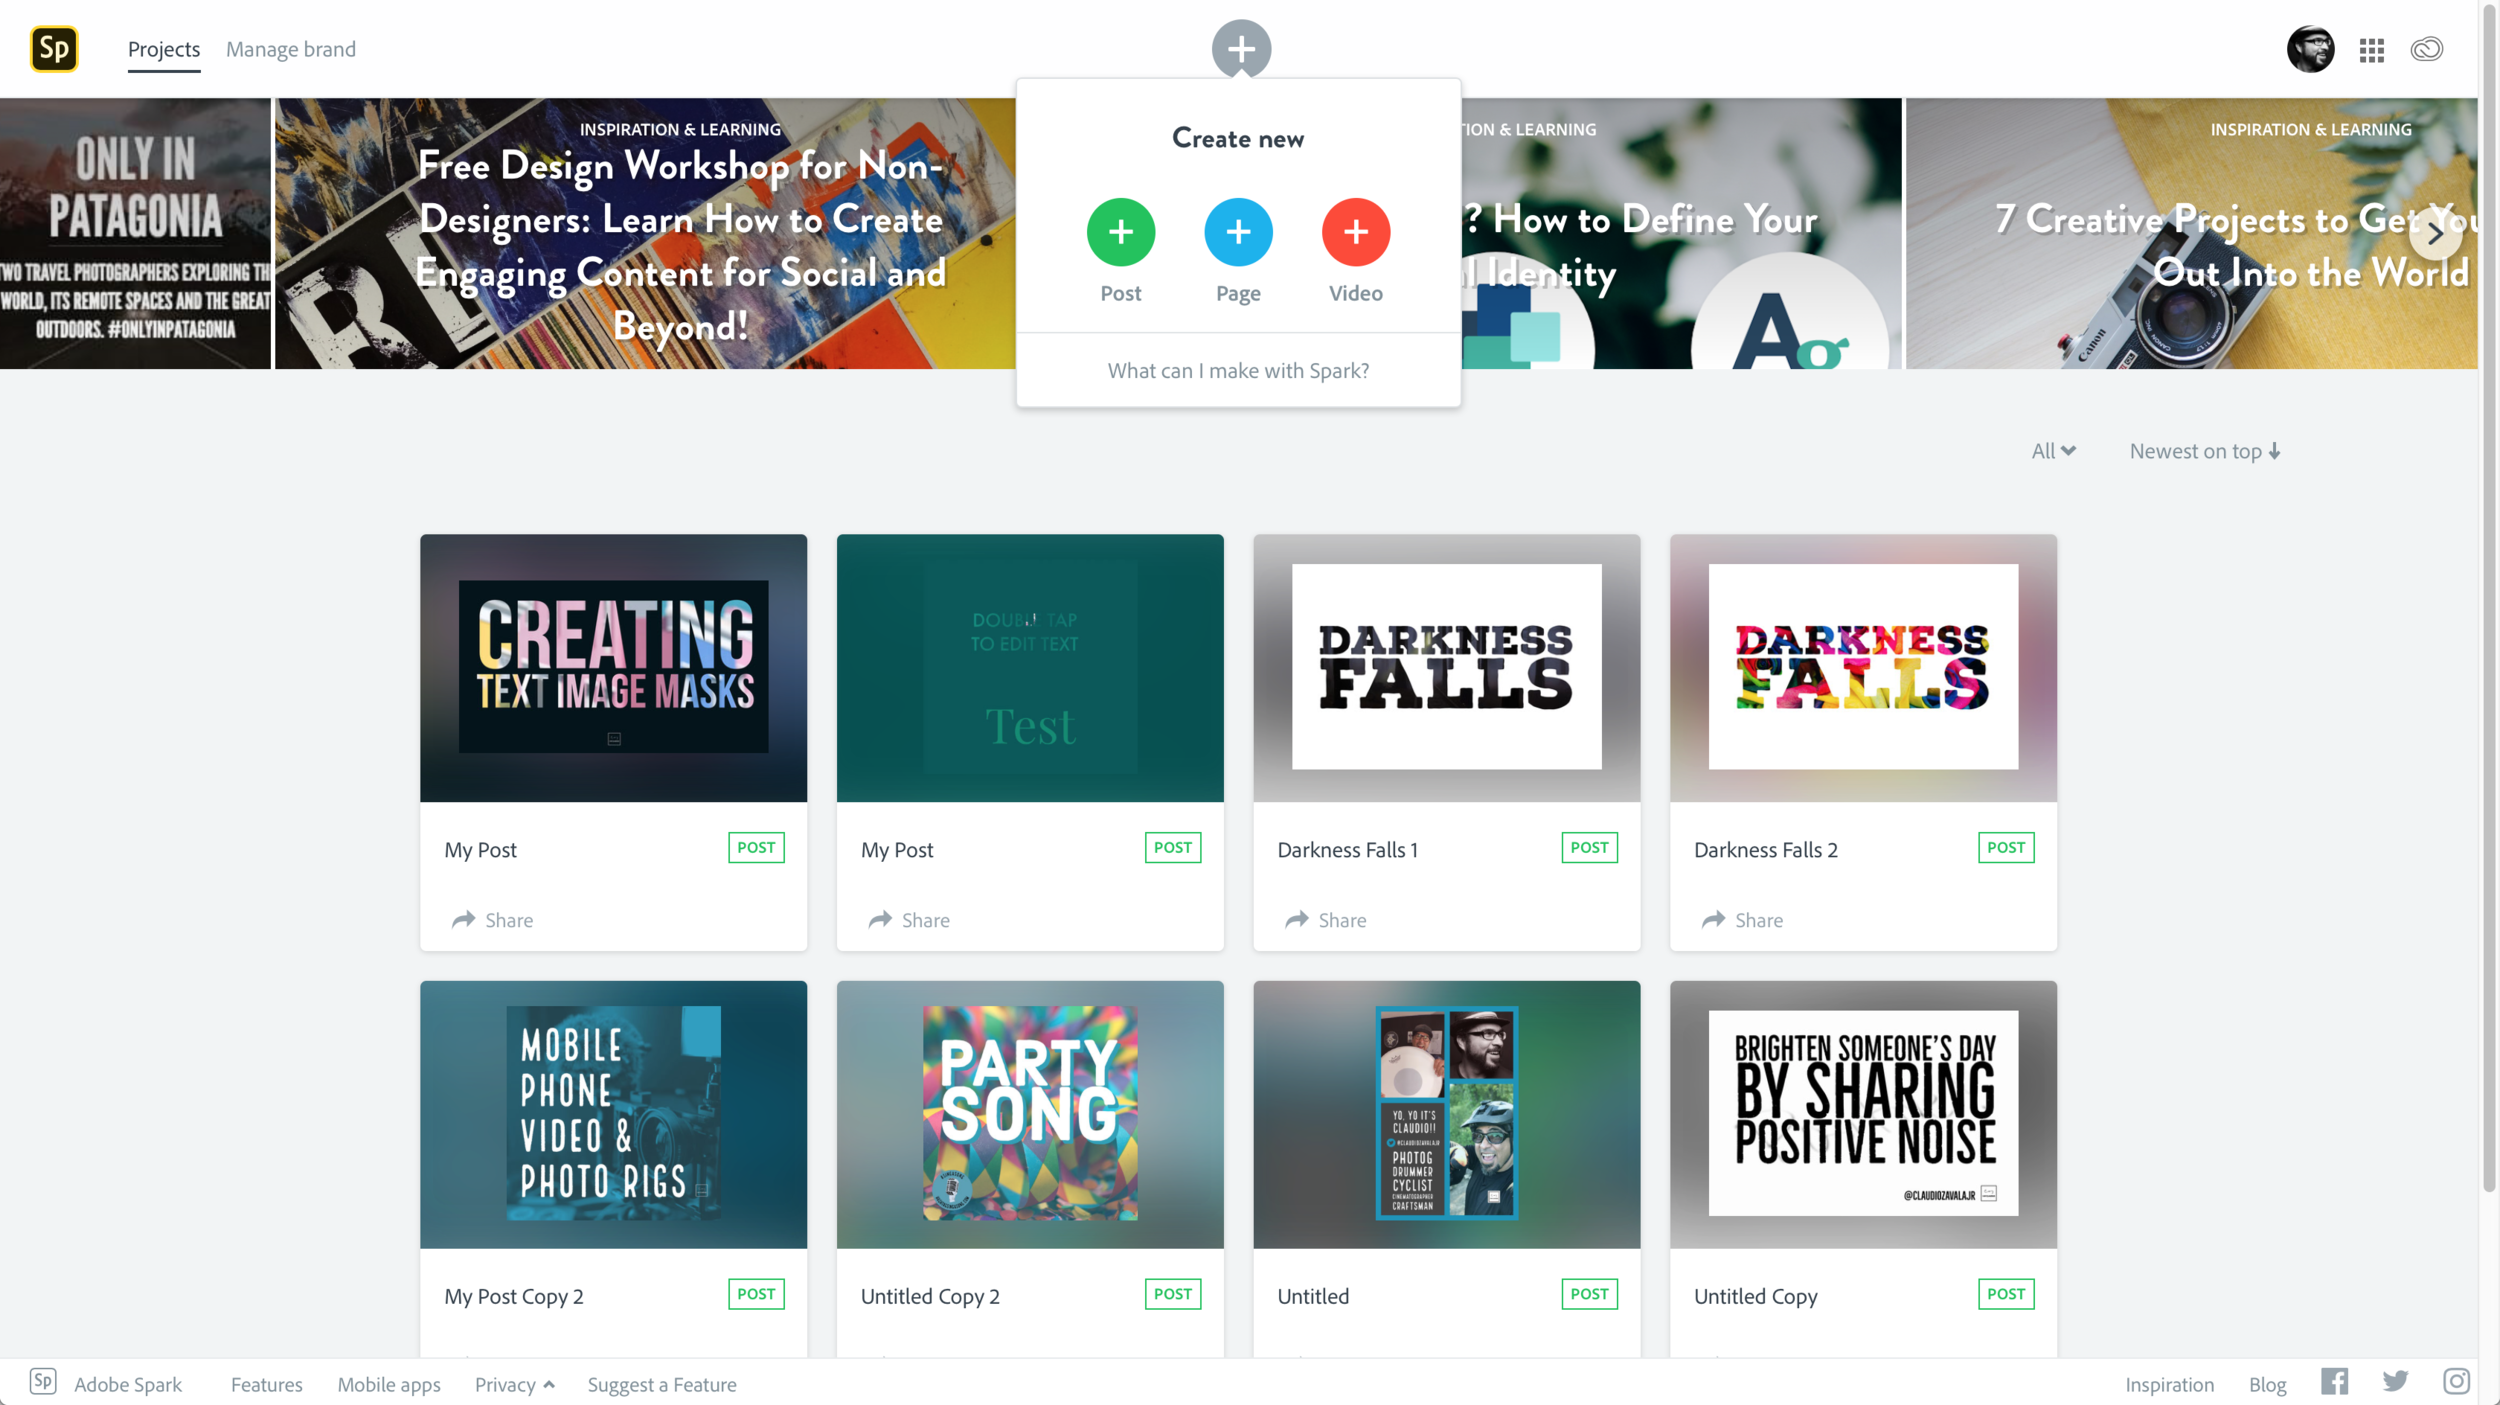
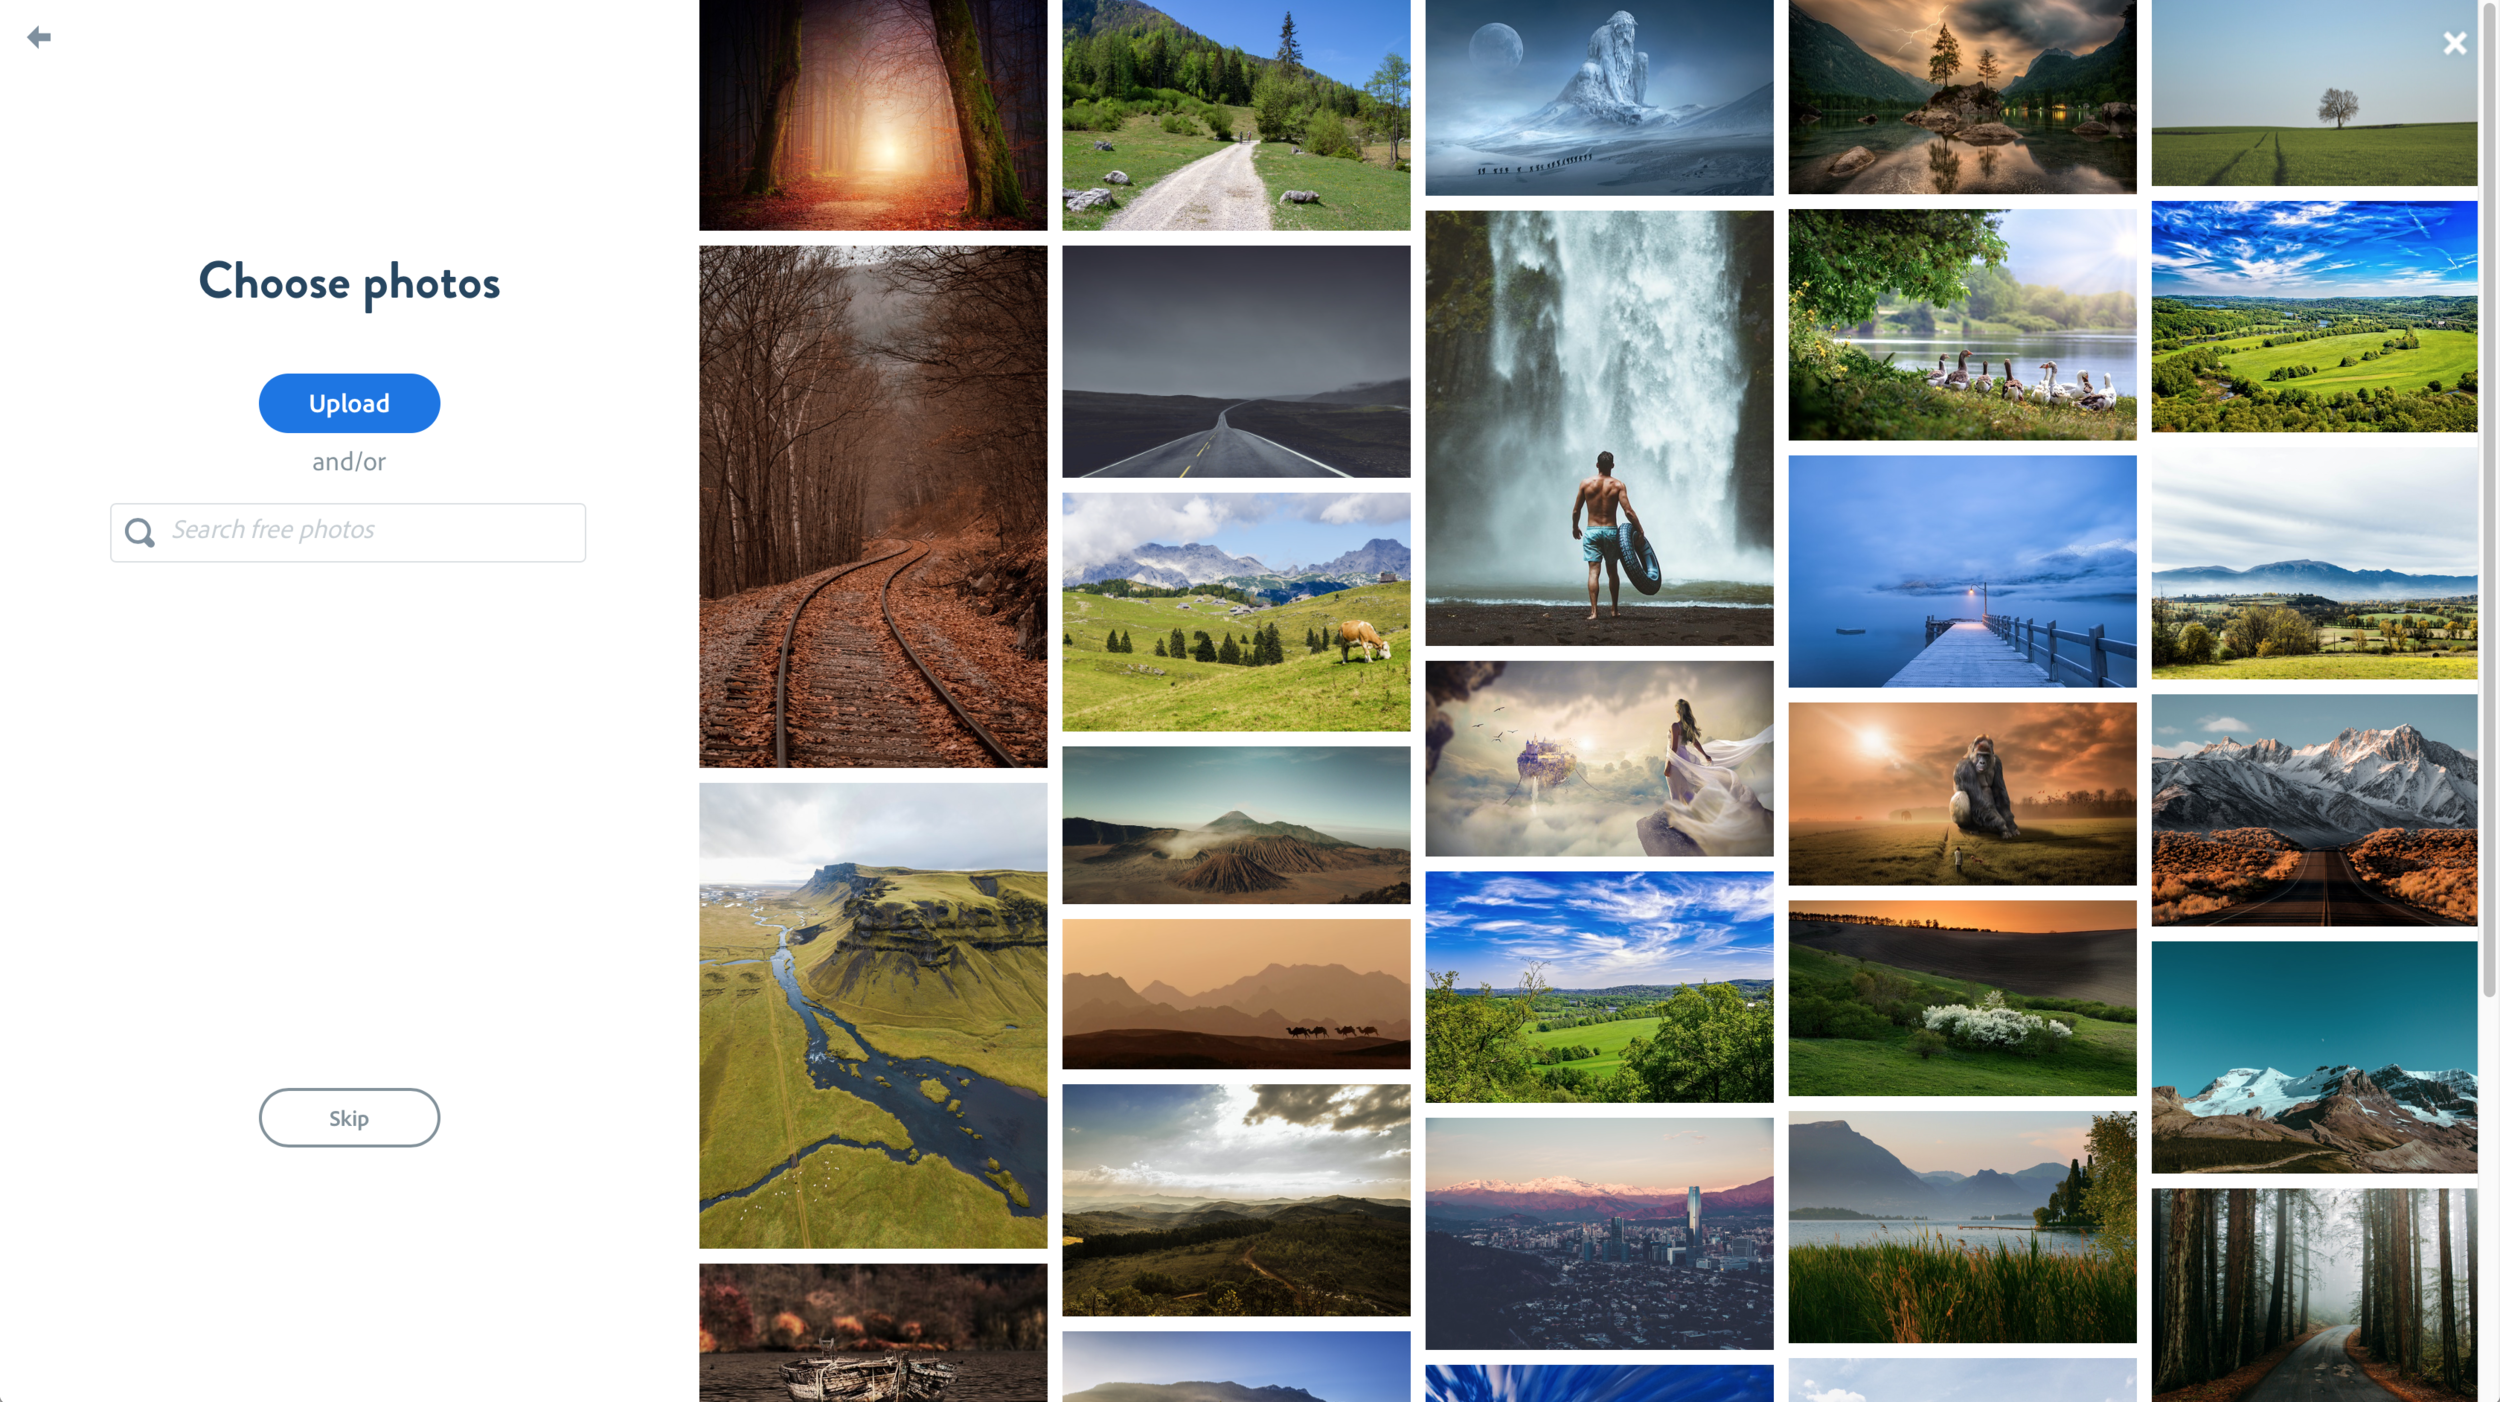
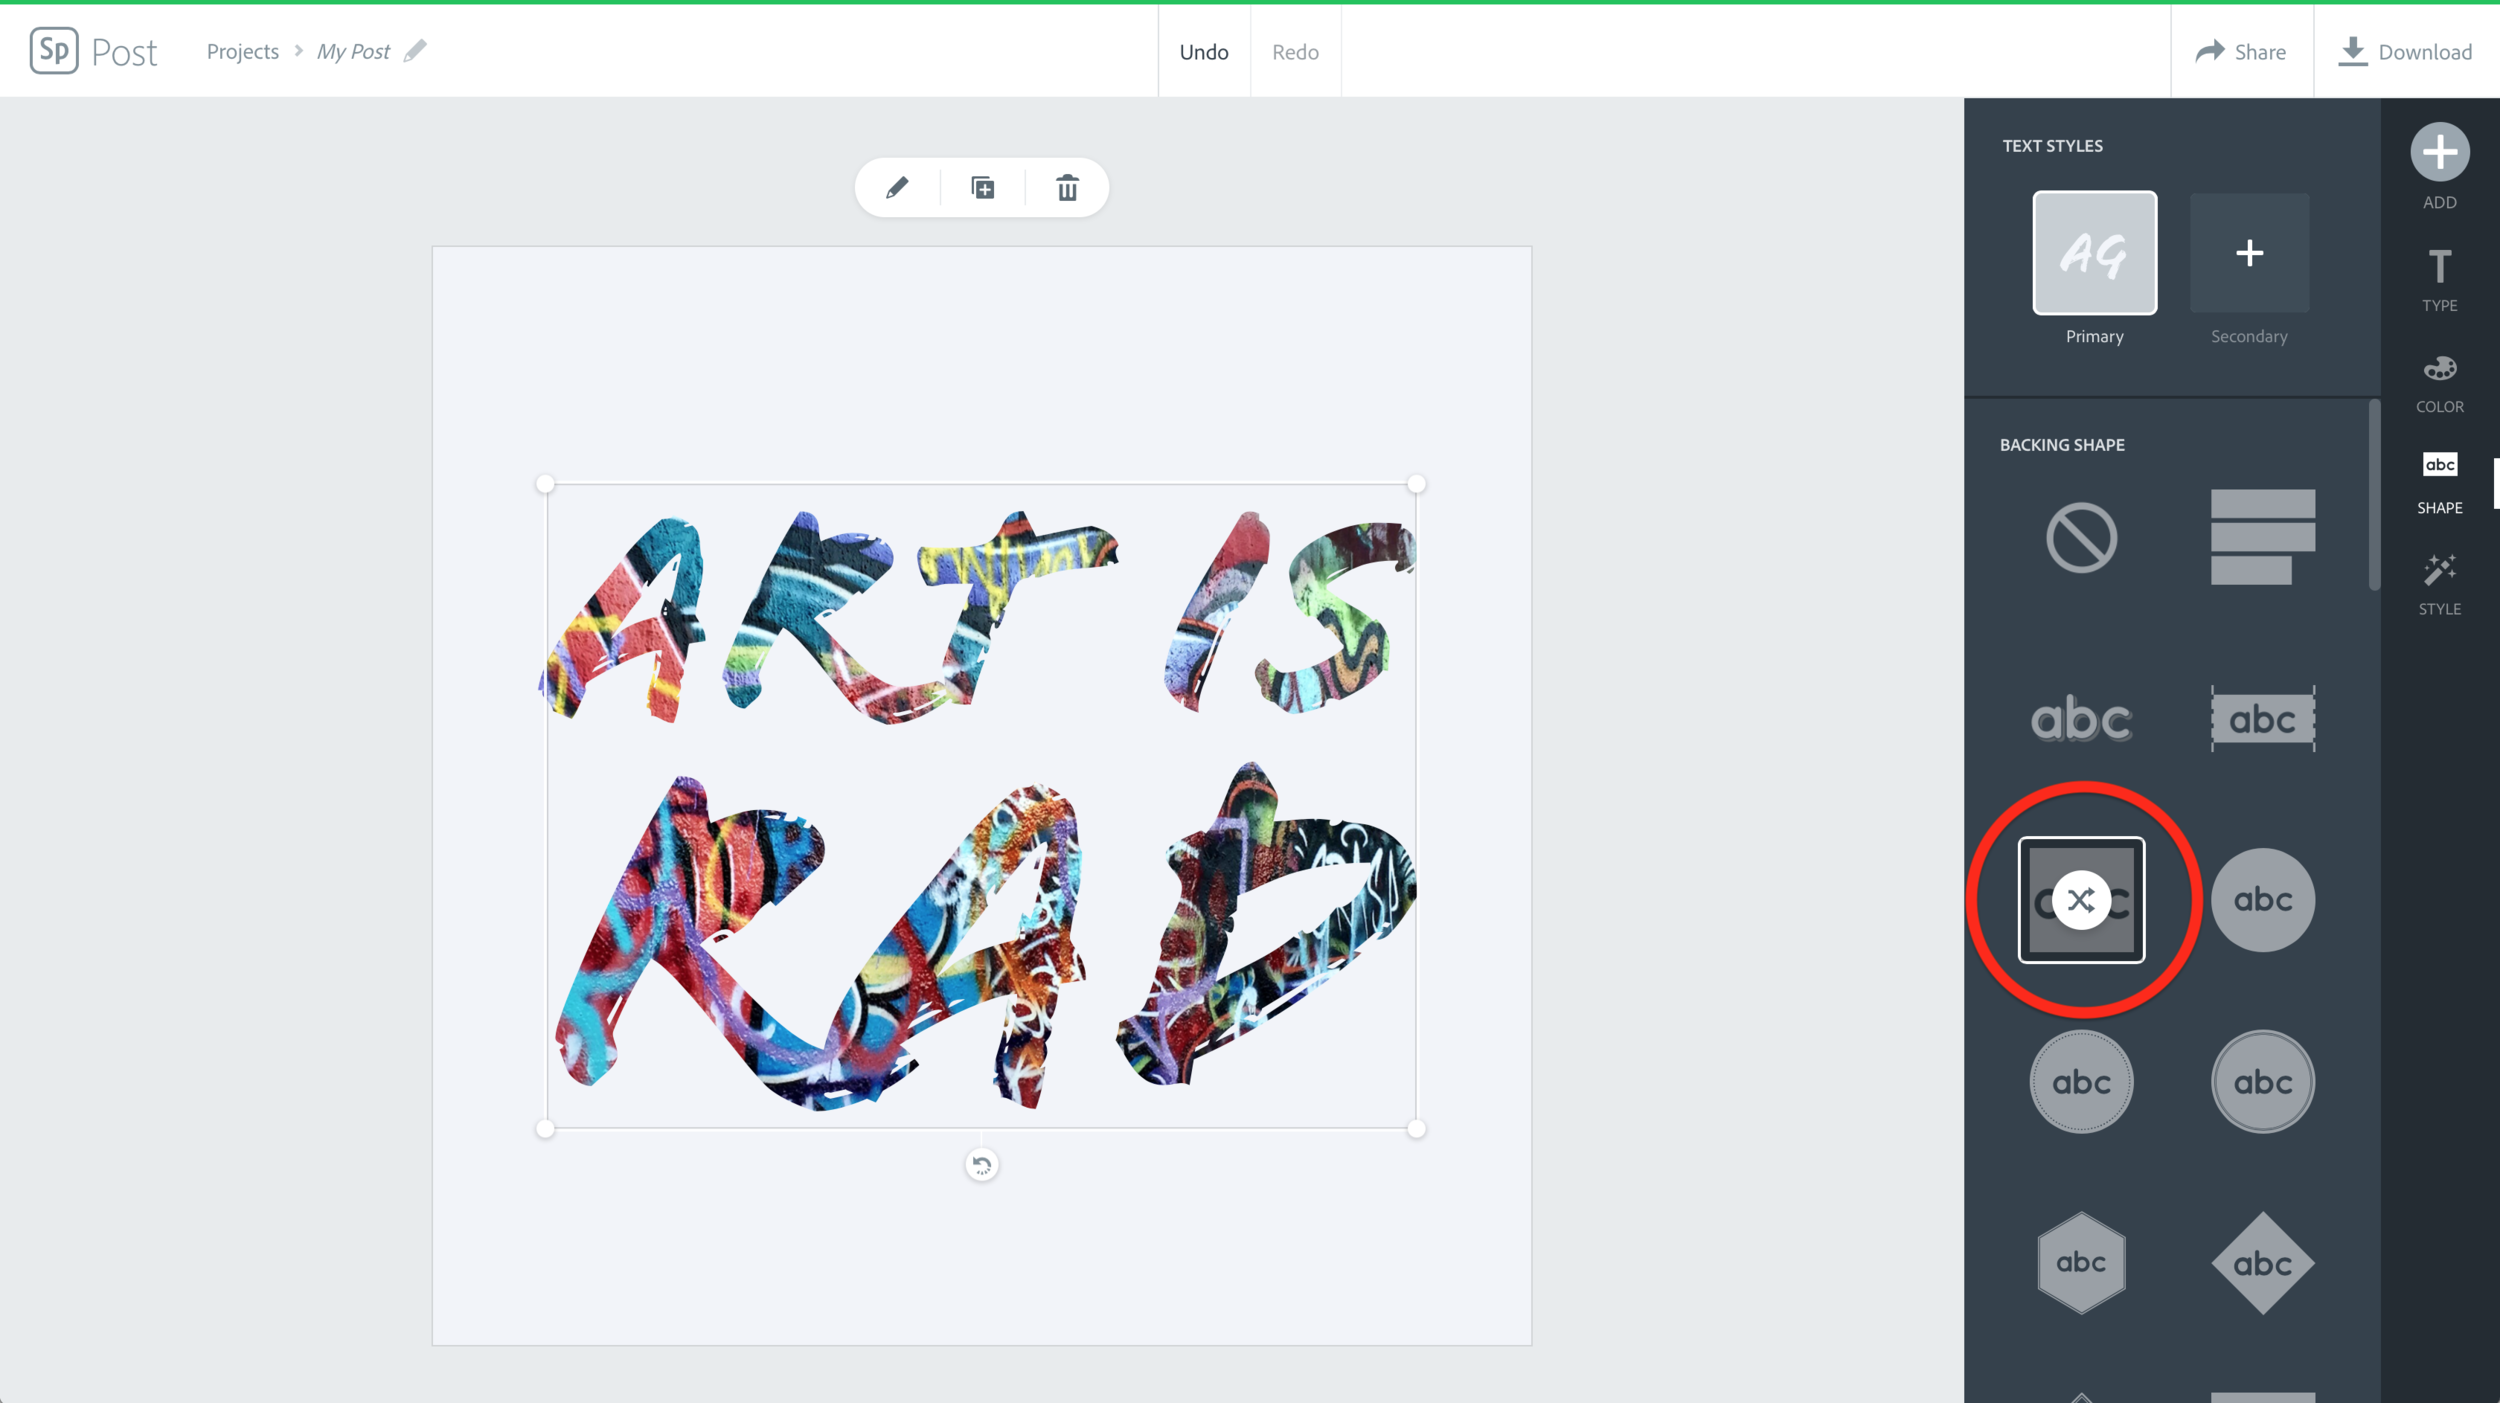
If you have not had a chance to use Adobe Spark Post or want a refresher, check out my Adobe Spark Post tutorial on YouTube. Alright, let’s get started. For demonstration purpose, I’m going to use the desktop version of Adobe Spark Post. You can create the same images using mobile version.Start by choosing choose Post from the main Create new menu. Choose Start from scratch in the options. Choose your preferred size and click Next. You can always change it later if desired.Select an image from the free photos or click Upload to choose your own photos and then click Next. Click Skip to let Adobe Spark Post choose for you. However, I encourage you to be intentional. Now, let’s create the text image mask. Double-click on the text box to change the text. Add whatever message you want. With the text still selected, change the text style by choosing a different font from the menu options on the right.With the text still selected, choose Shapes from the menu options and click the backing shape that fills the screen. Keep shuffling until you see the image appear through the text.And that’s pretty much it! You have just created a text image mask using Adobe Spark Post. Very easy to do! Download it and share it on your favorite social media platform or upload it to your website. Want to step by step-by-step walkthrough? Check out my tutorial below.[embedyt] https://www.youtube.com/watch?v=2MMV-q2PksQ[/embedyt]You can be as creative with text image masks. Check out these examples.
Creating masked text images is now much easier with Adobe Spark Post. You’re only limited by your creativity. Want to try? Click the remixable template below![envira-gallery id="1464"]Be sure to subscribe to get the latest blog, updates and other news!


